
How to use a breadboard?
A bradboard is a thing which we can use to make a circuit connections without the need of soldering the electronics component. This allows you to make a test circuit which you can reuse the electronics components and most important you can change the connections, add new connection easily. Below is the image of a breadboard. Even though it is a small breadboard, it is still very useful. If you observe closely, it's half portion is a mirror of other half and yes it is true. The upper portion of exactly same as the lower portion.
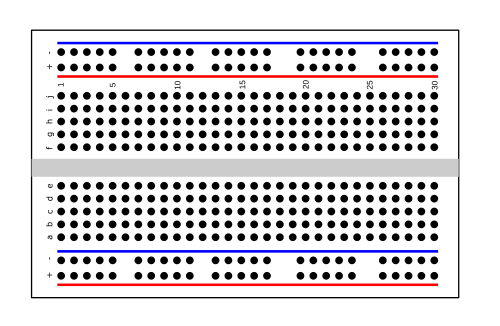
There are so many holes in it. You can put electronics component through these holes. These holes are internally connected to the other holes which makes the internal connection. These internal connection are very useful to make your desired connections. If you understand the internal connection, you'll find very easy to make connections. Lets's see how these holes are internally connected to each other. We'll focus only one half of the breadboard because other half is the exacly same as the
Horizontal Connections
The first row and second row holes which is shown in the figure below are internally connected horizontally to each other. In each row, we can make external connection which is the number of holes in the row. In below figure, we have 25 holes in a row, we can make same 25 connections for each row.
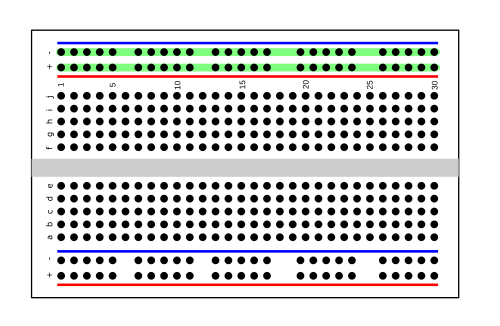
Usually, Vcc and Gnd connections are used more in a circuit so you can use this to connect power suppy to this. So that you take power from this and suppy that power to the main circuit.
Verticle Connections
Below the first two rows, there are five rows and each rows are vertically connected to each other internally. In our breadboard, we have 30 columns (excluding first two rows) so we can make thirty different connection externally.
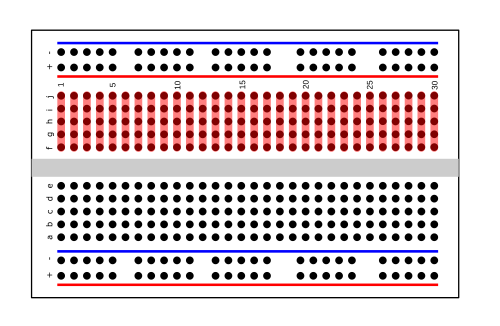
This part is for mainly making the main circuit. As the upper half internal connection are same as lower half, the bottom two rows can be used as to connect main power supply.
Tips for Making Connections
There are so many different ways to make the connections but these tips helps you to make good prototyping circuit connections.
- Use first row for Vcc and Last row for GND of the power supply. This will reduce the chances of short circuit of the power supply
- Place your electronic components only middle rows (verticle connections) of the breadboard.
- Avoid using any components or wires which has twisted legs.
- Make sure to check any short connections before turning the power supply(Specially Vcc and GND connections).
Make a Circuit
Let us make a simple half wave rectifier circuit. In these days, we don't use any bulky transformer to make this circuit, we use a function generator which generates a sine wave, square ware, triangular wave etc. We can directly connect the output of the function genreator to the half wave rectifier without worrying about the high voltage of the main supply.
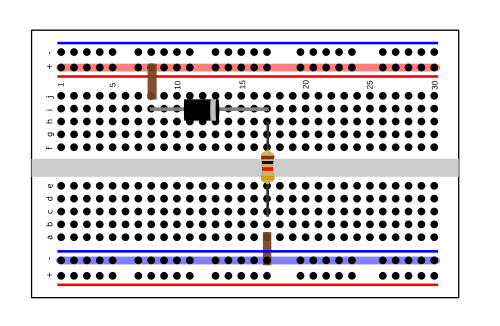
First of all, turn off the power supply or don't connect the power supply to the breadboard. Not connecting power supply to the breadboard would be nice idea. Let's choose first row for Vcc and last row for GND.
Place diode and resistor to the breadboard and make connection. One end of the diode is connected to the resistor and other end is connected to the Vcc. One end of the resistor is connected to the diode and other end is connected to the GND.
Make sure connection are proper and when everything is right, set desired wave, frequency, and voltage in the function generator and connect the output of the function generator to the power supply input connections of the breadboard.