
How to Store An Image on FPGA (BRAM)?
Suppose you are working on image processing-related applications on FPGA. In that case, you must have faced the problem of storing raw images on FPGA. Storing raw images requires a more significant memory. You may use low-cost random numbers that can be used as a replacement for the image. Thankfully, we have Block Random Access Memory (BRAM) in FPGA. We can use this as Read Only Memory (ROM) or Random Access Memory (RAM). This memory is highly configurable, and you can utilize this to store raw images.
Most images stored on mobile phones, cameras, or computers are not raw but compressed images. One cannot directly use these as raw images. You are required to extract the pixel values, and then we can use the pixel values in our FPGA project. An image has lots of pixels. How can we manage those? Scripting languages like Python can do this. We can transfer these pixel values to FPGA's BRAM. Then, we can do whatever image processing we want on FPGA.
Pixel Values Extraction
Each pixel has a bit depth, like 8-bit, 16-bit, or something else. We can't read this directly from an image file because most of the image is compressed, it may have information other than pixels, and it may have more dimensions (if an image is color, it may have more than 2D). Lots of libraries are available in Python; we'll use one of them.
from PIL import Image
import numpy as np

img = Image.open('./image.jpg') #Open an image from current directory
gray_img = img.convert('L') #convert image to greyscale
img_arr = np.array(gray_img) #convert image to 2d array of pixel values
d1 = img_arr.flatten() #convert to 2d to 1d array

file = open("image_pixel.coe","w")  #create a new coefficient file

file.write("memory_initialization_radix=10;") #first line
file.write("memory_initialization_vector=")   #pixel values starts here
for x in range(0,len(d1)):
    file.write(str(d1[x]))
    file.write(" ")
file.write(";") #closing of coe file
file.close()    #close the file
Create BRAM and load the file
In this example, the image is 256x256 pixels, and each pixel requires an 8-bit width. So, we require BRAM of depth 65536 and width 8.

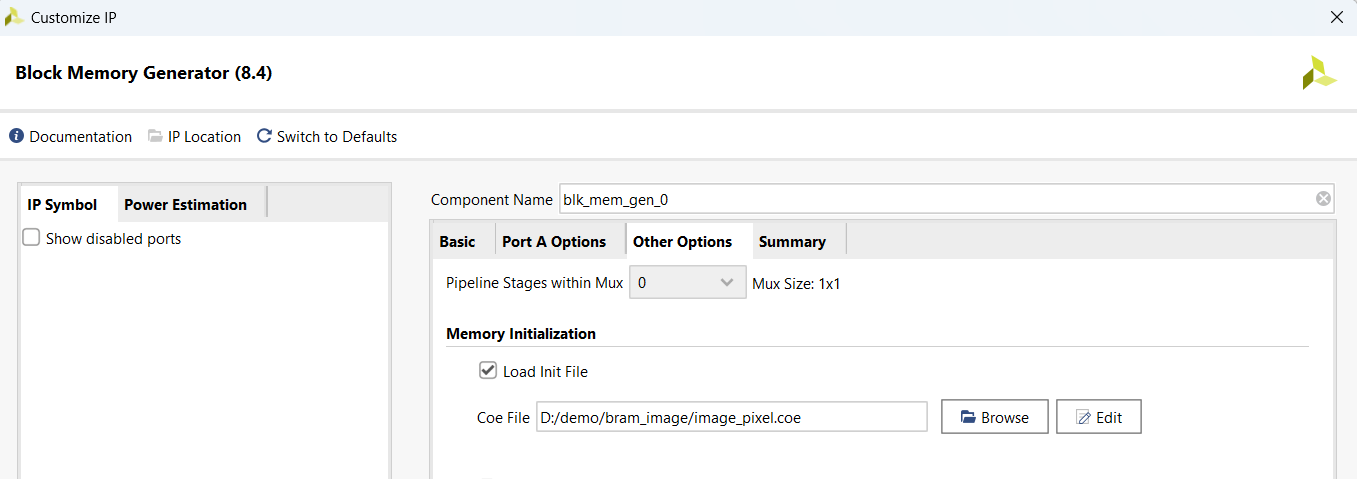
After creating BRAM with the required width and depth, load the core file generated from the above Python code containing all the pixel information. You can click on Other options of the BRAM wizard, click the browse button, and load the coe file.
Verilog Code and Testbench
module image_test;
reg clk = 0;
reg [15:0]address = 0;
wire [7:0]data_out,data_in;

wire read_write = 0;
integer i;
blk_mem_gen_0 uut(.clka(clk),.addra(address),.dina(data_in),.douta(data_out),.wea(read_write));

initial begin
for(i = 0; i < 65536; i= i+1)begin
    #40
    address = i;
end
$finish();
end

always #10 clk = ~clk;
endmodule
