
Simulating Verilog HDL using iVerilog and GTKwave
iVerilog is an open-source tool for simulating and synthesizing Verilog code. It is lightweight (only a few megabytes of disk space is required) and it is available for both Linux and Windows. We can simulate the Verilogcode and see the output of described Verilog HDL using GTK wave
In this article, I'll show you how to install open source tools for simulating Verilog code and how to use them to see simulation outputs.
Why not other commercial tools?
You've started learning Verilog for your projects or for any other reasons? Great! 😍, but for simulating or synthesizing the Verilog code you require a toolchain. When you search Verilog simulator on the Internet, you'll find various online or offline tools and some of them are commercial tools. You decide to get started with online tools. Then you realise that the online tools are not so good for learning Verilog efficiently because online tools require a stable Internet connection and sometimes the online tools do not work properly. Then you decide to download an offline toolchain.
You find some free tools for Verilog simulation and then you realize that the tool is not user-friendly 😓 (in the beginning). How to download the tool? How to simulate? There is no proper instruction to use the free tools 😖. Then you find a commercial toolchain which is freely available and easy to use. Nice! 😊
Then you start downloading the commercial toolchain you realise that it is too big and lots of bandwidth and time are required😑. Somehow you've managed to download the toolchain and yeah it is working fine 😀 there are lots of decent tutorials are available on the Internet.
Problems with commercial tools?
- It is too big in size and lots of bandwidth for downloading the tool and large disk space is required
- When you start using the tool, you realize that it takes too much time to load the application when it is opened
- Sometimes the tool is stuck into the loop and doesn't work at all.
- Most importantly, it consumes too much time for simulating a Verilog code (It is too slow 😓)
How to install iVerilog and GTKwave in Ubuntu 22.04?
Installing iverilog and gtkwave in ubuntu is not so difficult. All you need is to just open the terminal and type a few commands. Follow step by step.
Step 1 - Open Terminal
Open Terminal (ctrl + alt + T) and type following command.
Step 2 - Upgrade all packages
Write following command (which is shown in white text). After this command, it may ask you for password. Type password and press enter.
user@ubuntu:~ $ sudo apt update && upgrade
Step 3 - Install iVerilog
The command for installing iverilog is given below
user@ubuntu:~ $ sudo apt install iverilog
Step 4 - Install GTKwave
The command for installing GTKwave is given below
user@ubuntu:~ $ sudo apt install gtkwave
Step 5 - Verifying the installation.
Type following command
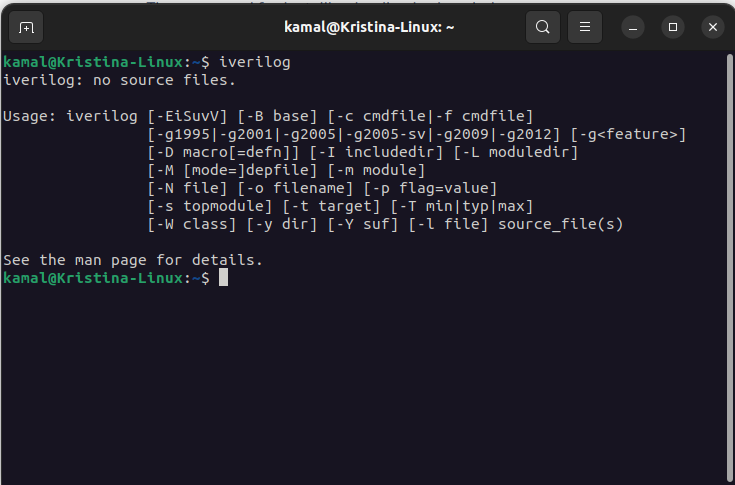
user@ubuntu:~ $ iverilog
You'll get following outputs. If you're getting this output then iVerilog is install correctly. If not then iverilog is not installed and you are required to install again properly.
Type following command
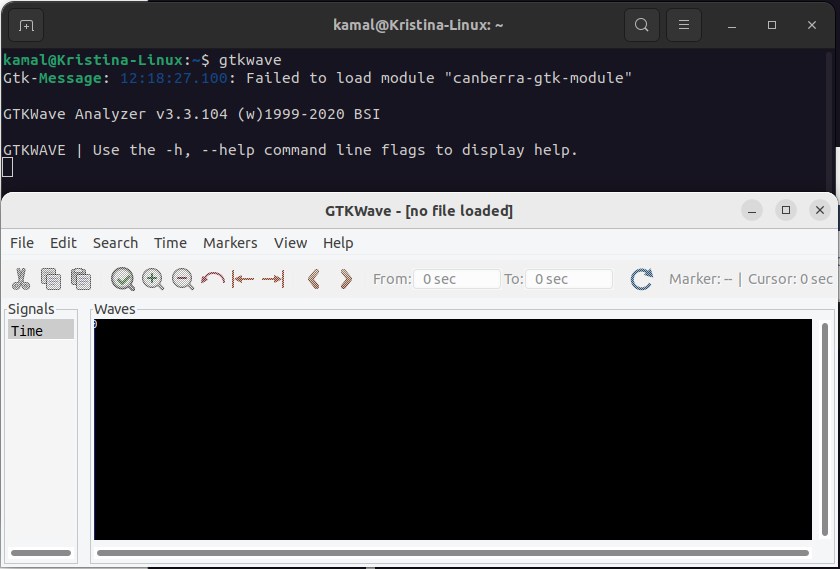
user@ubuntu:~ $ gtkwave
You'll get following outputs. If you're getting this output then GTKwave is install correctly. If not, go back to previous steps or start again from the step 1.
Simulating first Verilog code in iVerilog
We've installed all the tools required for simulating the verilog code. Now we'll write the verilog code and do the simulation.
open text editor and write the following verilog code. Save this code inside Home director with name hello.v. We are not creating the hardware but we are writing the verilog code to verify that the iVerilog tool is working fine.
module hello;

initial
    $display("Hello Verilog!");

endmodule
Open terminal and check weather the file hello.v is present or not (by typing command ls). If not, goto home directory (or where the verilog file is save), right click, click open in terminal

Write following command for compiling the verilog code
user@ubuntu:~ $ iverilog -o hello hello.v
You'll get a new file with name hello

Write following command and now you can see the verilog output
user@ubuntu:~ $ vvp hello

Describing a simple logic gate in Verilog
Till now, we've done Verilog code compiling. Now we'll describe hardware in a text and check whether the described hardware is generating desired output or not. We'll describe a NOT Gate to keep it simple. The description of the NOT gate in the Verilog is given below. Write the code in a text editor and save it in the home directory with the name inverter.v
module inverter(
    input a,
    output y
);

not(y,a);

endmodule
If you've not understood the code. Don't worry! it is not difficult to learn verilog. For now, just see the code and analyse it. We've created a module and this module has an inverter. a is the input of the inveretr and y is output.

Creating Testbench
Create a new file with name inverter_tb.v and save in the same directory where inverter.v is saved and write the code as shown below.
module inverter_test;

reg a;
wire y;

inverter uut(a,y);

initial begin
    $dumpfile("inverter.vcd");
    $dumpvars(0,inverter_test);

    a = 0;
    #10
    a = 1;
    #10
    a = 0;
    #10
    a = 1;
    #10
    $finish();
end


endmodule
Simulating the Verilog Code and Testbench
We've created verilog code and testbench for and inverter and both are in the same directory. For simulating, type following command in the terminal.
user@ubuntu:~ $ iverilog -o inverter inverter.v inverter_tb.v
user@ubuntu:~ $ vvp inverter
user@ubuntu:~ $ gtkwave inverter.vcd
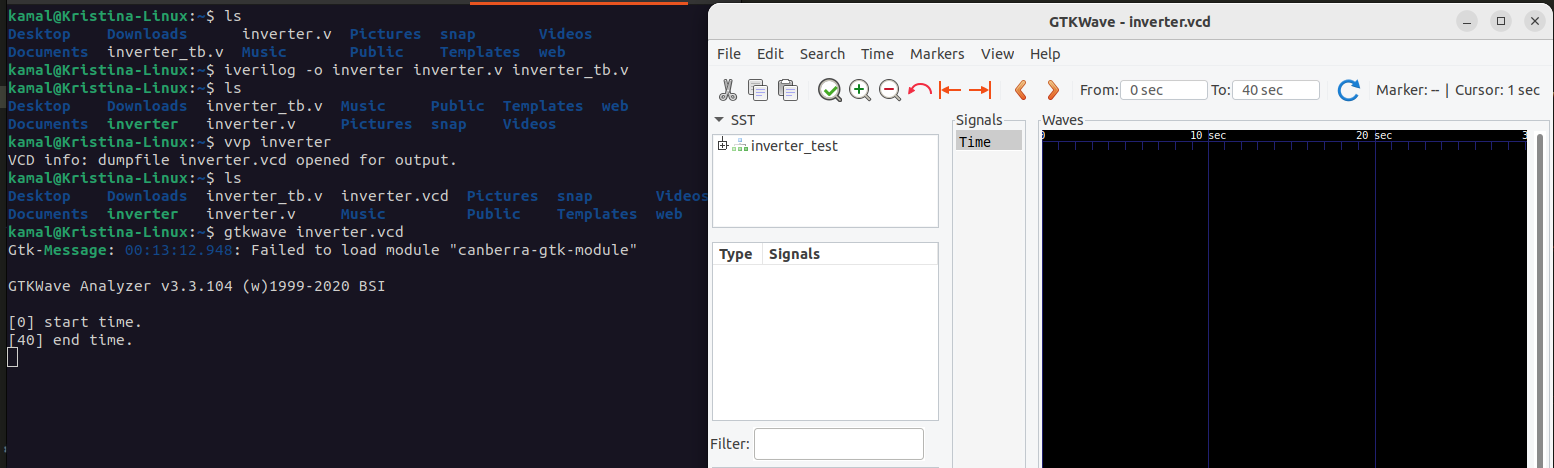
On GTKwave window, click on uut, wire a and wire b and you'll see the output as shown below
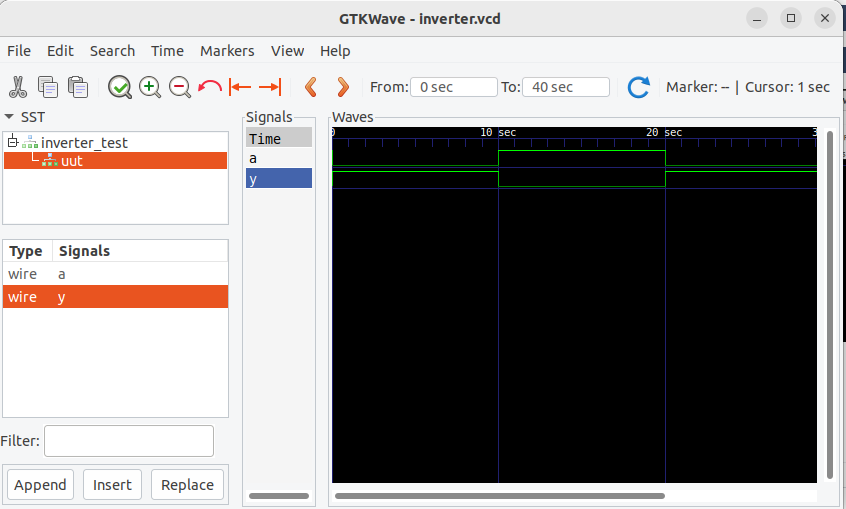
That's all